
Chapter 10
Using Amazon SageMaker
Using Amazon SageMaker
Deep learning applications may demand so much computational resource that easily goes beyond what your local machine can offer. Cloud computing services allow you to run GPU-intensive code of this book more easily using more powerful computers. This section will introduce how to use Amazon SageMaker to run the code of this book.
Signing Up
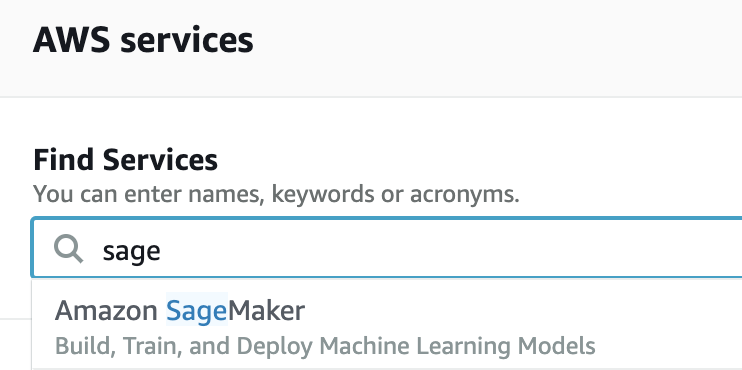
First, we need to sign up an account at https://aws.amazon.com/. For additional security, using two-factor authentication is encouraged. It is also a good idea to set up detailed billing and spending alerts to avoid any surprise, e.g., when forgetting to stop running instances. After logging into your AWS account, o to your console and search for "Amazon SageMaker" (see fig_sagemaker), then click it to open the SageMaker panel.
Creating a SageMaker Instance
Next, let's create a notebook instance as described in fig_sagemaker-create.
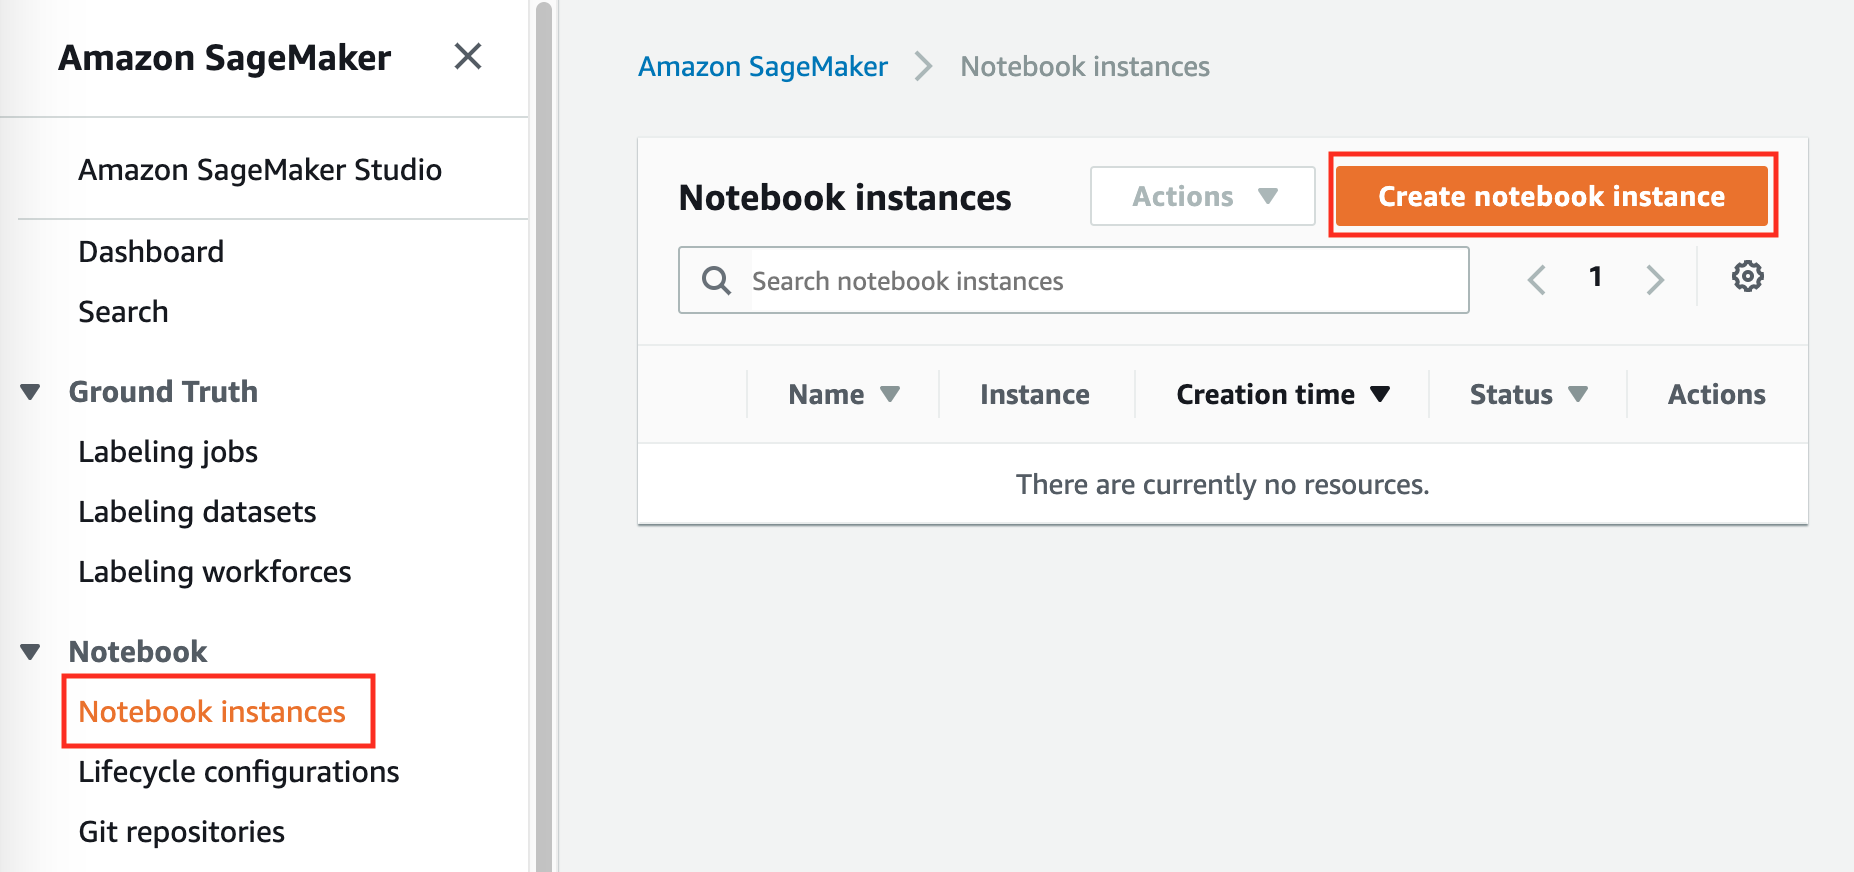
SageMaker provides multiple instance types with varying computational power and prices.
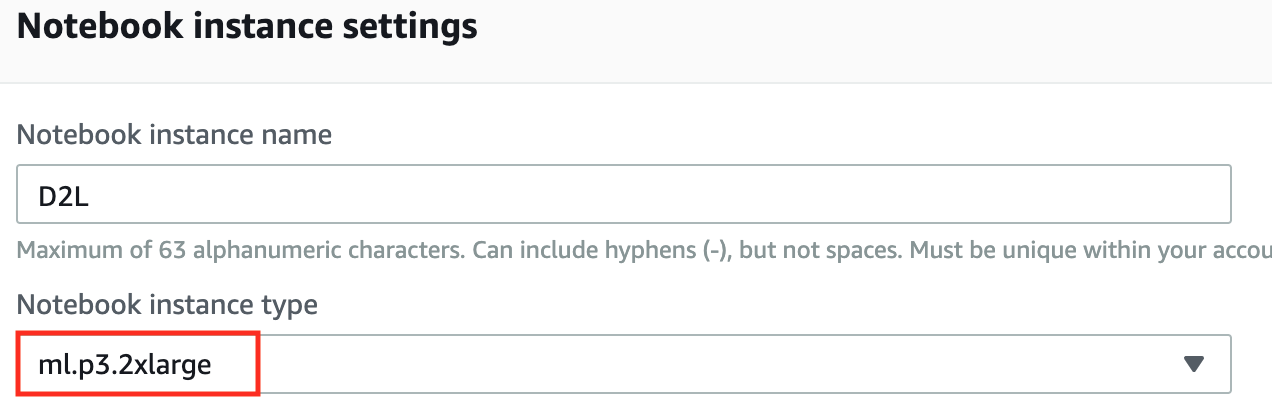
When creating a notebook instance,
we can specify its name and type.
In fig_sagemaker-create-2, we choose ml.p3.2xlarge: with one Tesla V100 GPU and an 8-core CPU, this instance is powerful enough for most of the book.
mxnet
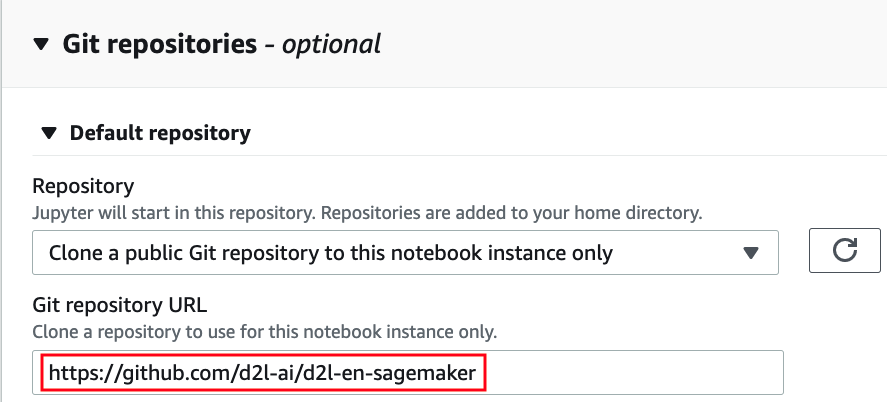
The entire book in the ipynb format for running with SageMaker is available at https://github.com/d2l-ai/d2l-en-sagemaker. We can specify this GitHub repository URL (fig_sagemaker-create-3) to allow SageMaker to clone it when creating the instance.
pytorch
The entire book in the ipynb format for running with SageMaker is available at https://github.com/d2l-ai/d2l-pytorch-sagemaker. We can specify this GitHub repository URL (fig_sagemaker-create-3) to allow SageMaker to clone it when creating the instance.
tensorflow
The entire book in the ipynb format for running with SageMaker is available at https://github.com/d2l-ai/d2l-tensorflow-sagemaker. We can specify this GitHub repository URL (fig_sagemaker-create-3) to allow SageMaker to clone it when creating the instance.
Running and Stopping an Instance
Creating an instance may take a few minutes. When the instance is ready, click on the "Open Jupyter" link next to it (fig_sagemaker-open) so you can edit and run all the Jupyter notebooks of this book on this instance (similar to steps in sec_jupyter).

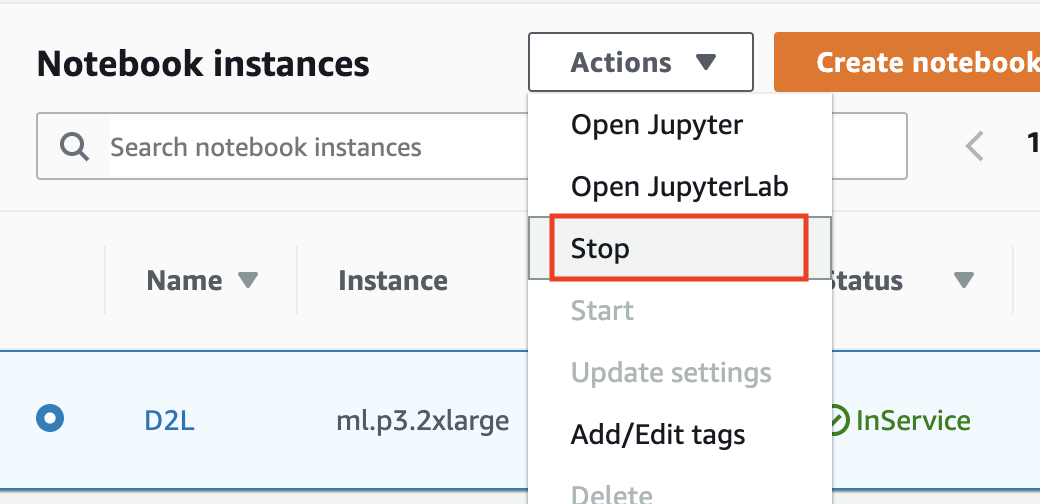
After finishing your work, don't forget to stop the instance to avoid being charged further (fig_sagemaker-stop).
Updating Notebooks
mxnet
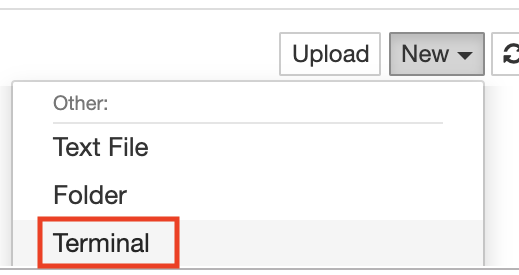
Notebooks of this open-source book will be regularly updated in the d2l-ai/d2l-en-sagemaker repository on GitHub. To update to the latest version, you may open a terminal on the SageMaker instance (fig_sagemaker-terminal).
pytorch
Notebooks of this open-source book will be regularly updated in the d2l-ai/d2l-pytorch-sagemaker repository on GitHub. To update to the latest version, you may open a terminal on the SageMaker instance (fig_sagemaker-terminal).
tensorflow
Notebooks of this open-source book will be regularly updated in the d2l-ai/d2l-tensorflow-sagemaker repository on GitHub. To update to the latest version, you may open a terminal on the SageMaker instance (fig_sagemaker-terminal).
You may wish to commit your local changes before pulling updates from the remote repository. Otherwise, simply discard all your local changes with the following commands in the terminal:
mxnet
cd SageMaker/d2l-en-sagemaker/
git reset --hard
git pull
pytorch
cd SageMaker/d2l-pytorch-sagemaker/
git reset --hard
git pull
tensorflow
cd SageMaker/d2l-tensorflow-sagemaker/
git reset --hard
git pull
Summary
- We can create a notebook instance using Amazon SageMaker to run GPU-intensive code of this book.
- We can update notebooks via the terminal on the Amazon SageMaker instance.
Exercises
- Edit and run any section that requires a GPU using Amazon SageMaker.
- Open a terminal to access the local directory that hosts all the notebooks of this book.